Overview
This guide will walk you through the key steps to get up and running with Coresee - from creating your account to customizing your meeting rooms and hosting your first session.
By the end of this guide, you’ll know how to:
- Set up and manage your Coresee account
- Create and configure rooms
- Host meetings and manage participants
- Share media
- Customize room appearance
Let’s get started!
Create a Coresee Account
You can sign up by visiting https://app.coresee.com in your browser, or by downloading our native application.
To Sign Up:
- Click Sign Up
- Enter the following details:
- Email Address
- Your Name
- Password (must include): Minimum of 8 characters of which one lowercase letter, one uppercase letter, one number, one special character
- Agree to the Privacy Policy and Terms of Service
- Click Sign Up to create your account.


You’ve created your Coresee account!
If you already have an account, enter your credentials in the Sign In section.
Set Up Your Profile
To personalize your account, navigate to your User Profile, accessible from the homepage by clicking your avatar in the upper right corner.
- Upload a profile picture (optional).
- Under Account Settings, double-click your Name and Title to edit

Create Your First Room
A Coresee room is not only where you can have meetings, but also a persistent workspace for media and collaboration.
The Homepage is your access point for both your created meeting rooms and those you're invited to. Your meetings are displayed with room cards, where you can access and/or adjust information for each room.
To Create a Room:
- Click the + button
- A new room card will appear on your Homepage
- Rename your room by double-clicking the title

To Customize a Room:
Click the room card to open the Control Panel on the right.
Settings Tab
The Settings tab is your control center for configuring how participants access and experience your room. You’ll also find key room information here, including the room name, description, and shareable link for easy distribution.
- Enter Room on Mute: All participants will join the room with their microphones muted by default.
- Host Required: The room can only be accessed if a host is present. Without a host, participants will remain in the Lobby.
- Login Required: Only users with a Coresee account can join the room.
- Private Room: Only invited users can enter.

Invite Tab
Add participants and assign roles. Critical for Private Rooms!
Recording Tab
View and manage all room recordings.
Media Tab
Upload and organize media content for your meeting.
Once your room is configured:
- Copy the room link from the Settings tab to share
- Click Join to start your first meeting!
The Lobby
Before entering a meeting, you’ll land in the Lobby - a space to adjust your video and audio settings.
- Buttons to enable/disable your camera, microphone, and speaker.
- Open the dropdown next to each input to modify device selection.
- Enter your name and title.
Click Join when you’re ready!

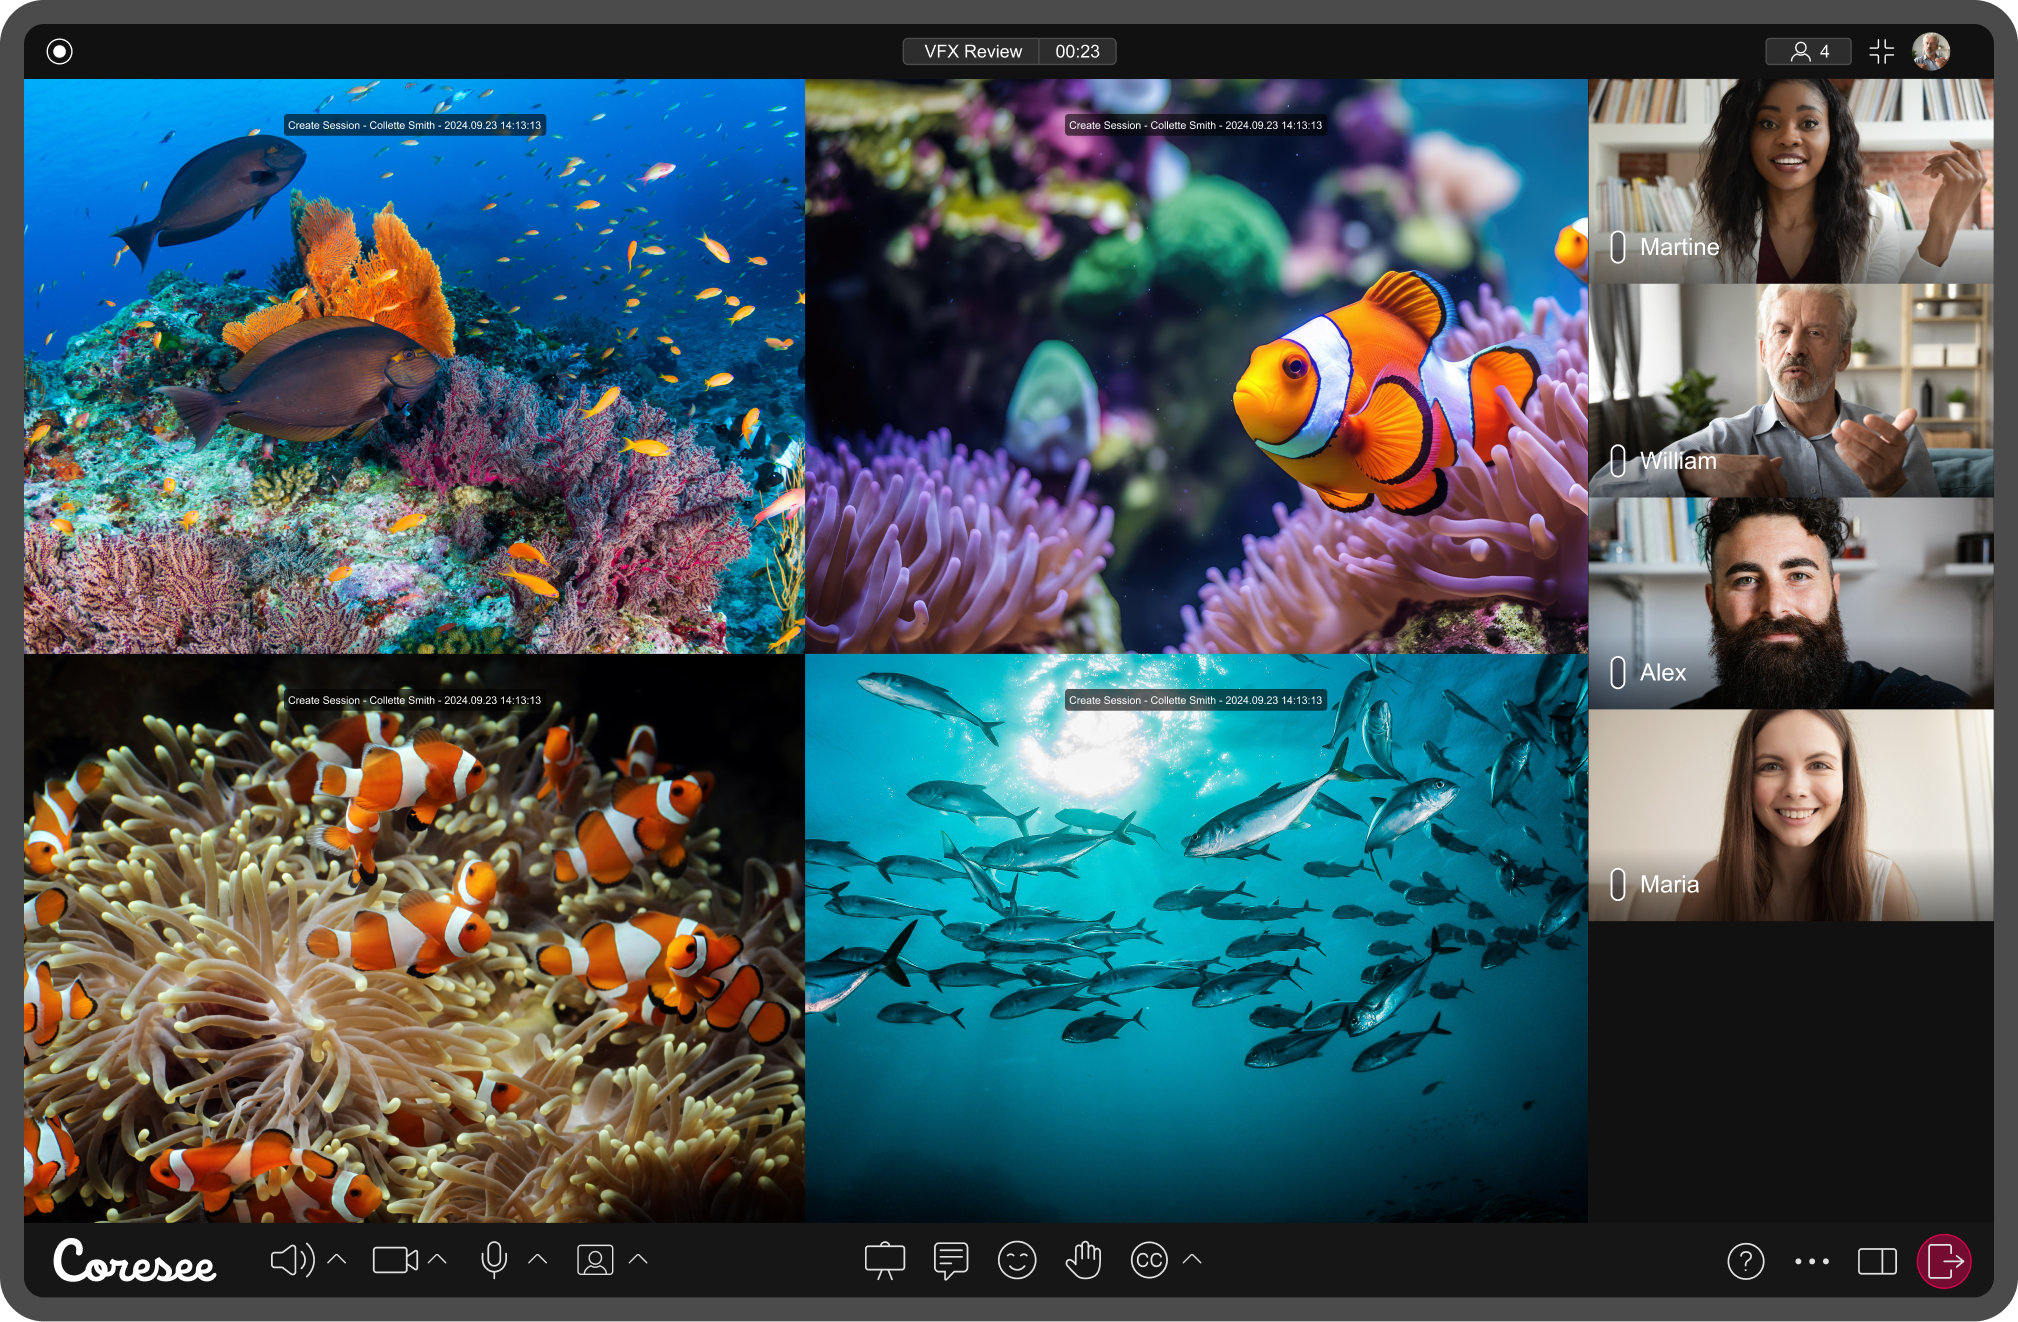
Welcome to Your Coresee Room!
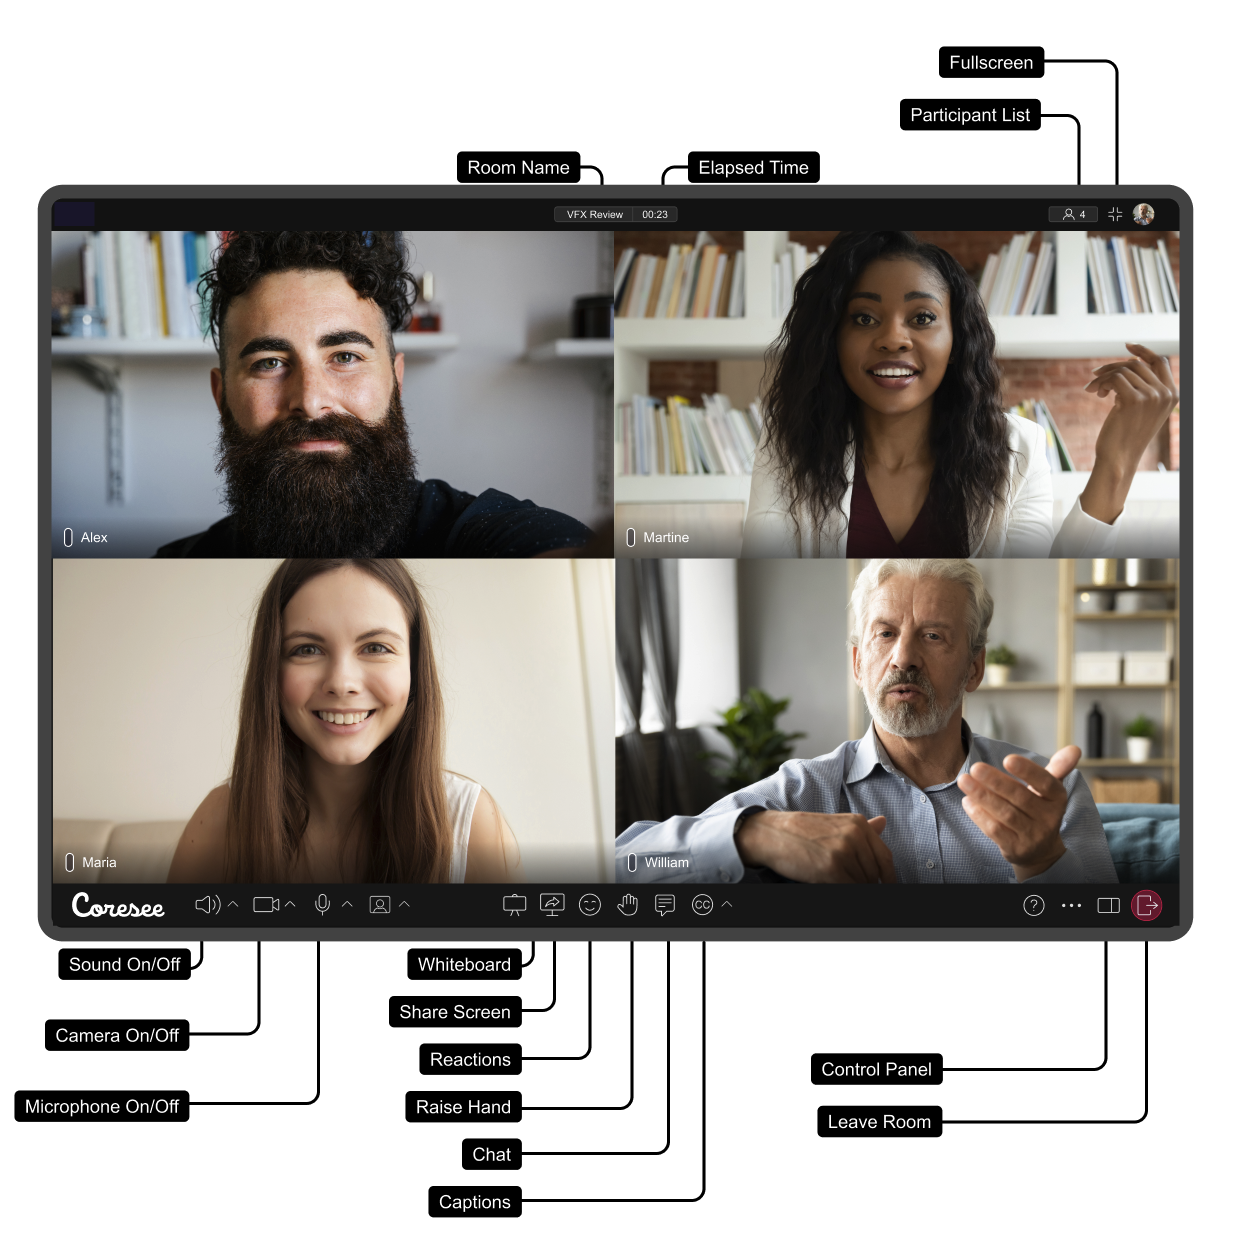
Control Panel
The Control Panel is a powerful tool designed to give Hosts full control over your meeting room. With a wide range of options, you can add media and files, adjust the room layout, and customize Participant settings.
Participants
The Participant Panel provides a real-time view of everyone currently active in the room. For better organization, participants are listed in the following hierarchy:
- Presenter
- Host
- Co-Host
- Participants and Guests

Each name card includes quick-access controls to mute a participant’s microphone, turn their camera off, and hide their video tile for all other attendees.
Note: When a participant is hidden, their microphone is also disabled. However, they can still see other attendees, view shared content, listen to the room, and use the chat.
Click the menu icon to access more advanced options:
- Assign roles like Co-Host or Presenter
- Initiate a private chat
- Disable microphone or camera
- Remove the participant from the meeting
Appearance
The Appearance tab allows the Host to customize how participants appear in the room.
By default, the Host controls the layout and can select from multiple configurations, tailored to different meeting styles and group sizes.
The room will automatically switch to a presentation layout when presenting media, sharing your screen, or collaborating using a whiteboard. The host may choose from 3 options.

You can adjust tile settings, including whether to display participant names and titles, as well as choose the tile style and aspect ratio that best fits your session.

Within the Personalized Branding section, you can select an image or video background, add a logo, and customize the image curtain using media already uploaded to your files.

Media Files
Within the Media Section, you can upload various file types, including images, videos, PDFs, and more. Use this section to present high-quality content during your meetings or as a collaborative file-sharing system with other participants.
Add Content
To add content, open the Files Menu. From there, you can:
Upload individual files or entire folders.
Link online media, such as YouTube videos.

Folder Management
Stay organized by creating new folders to categorize and manage your content effectively.
Selecting Content
Single Selection: Click on an asset's thumbnail.
Multiple Selection: macOS:
Cmd + Click /Windows:Ctrl + Click

Asset Actions
Right-click on an asset (or open the Files Menu when multiple assets are selected) to access the following options:
Download, Rename, or Remove
Move to Folder
Add to Playlist
Present to Room
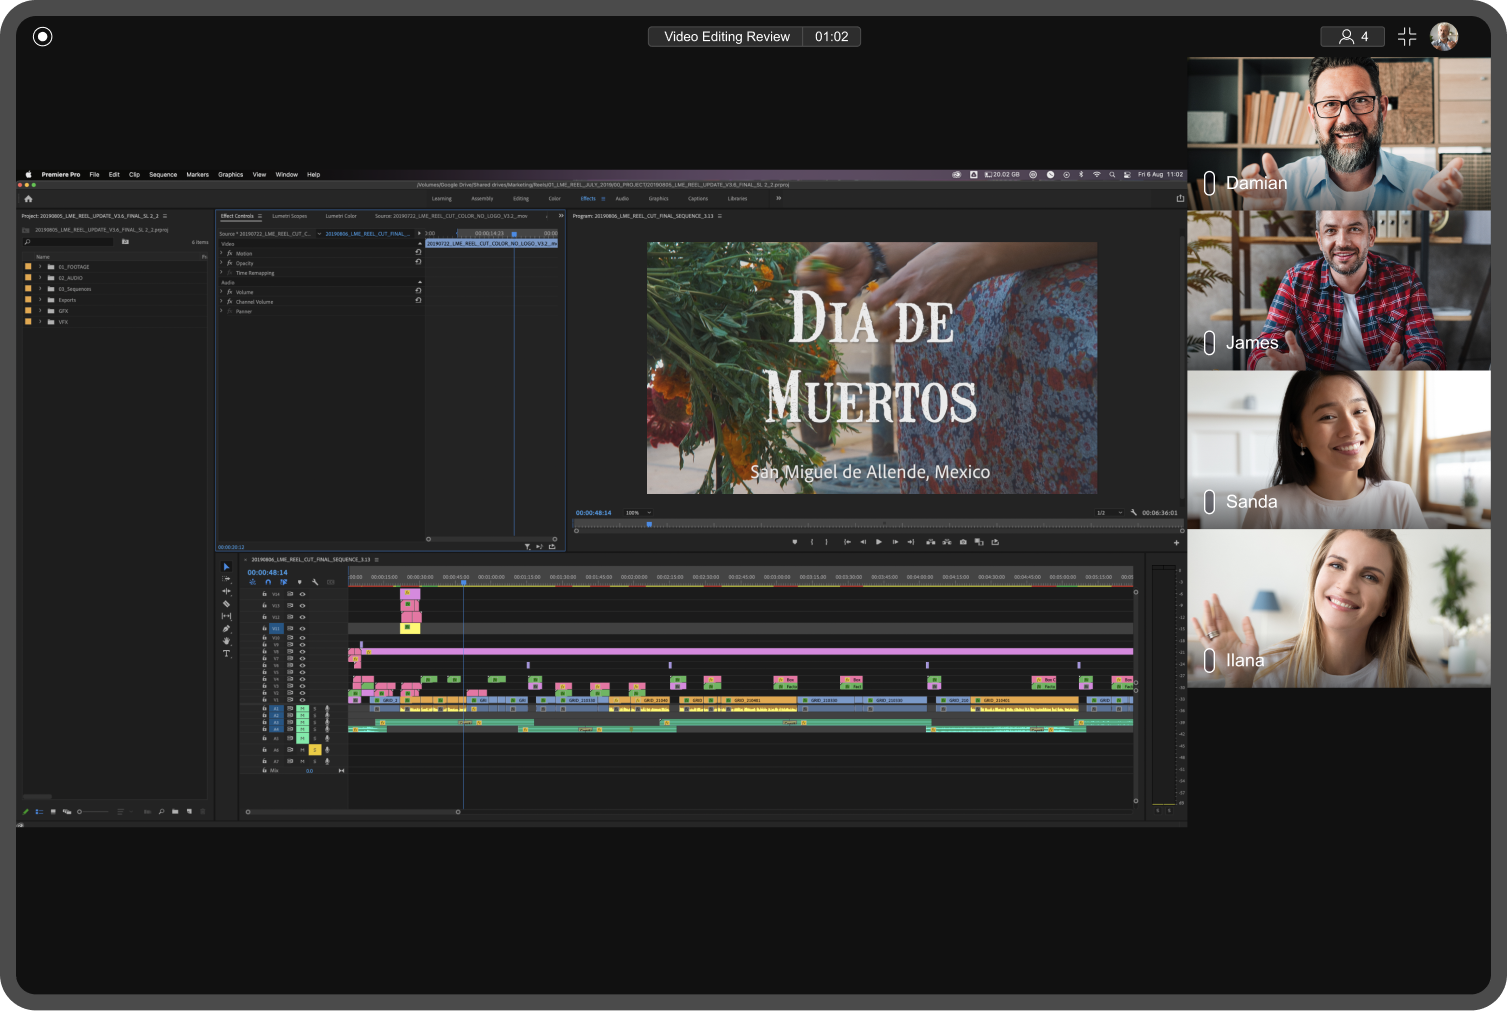
Presenting Content
To present, simply drag and drop a thumbnail directly onto the experience area. You can present up to 16 assets simultaneously!

Viewing Asset Details
Double-click a thumbnail to open its details panel. Here, you will find:
File Information: Technical specs and metadata.
Annotations: Currently only available for video files.
Playback Settings: Customization options for how the media displays.

Streaming Tab
Select the default streaming configurations for both screen sharing, as well as for live streams. These settings help ensure optimal quality and performance every time you go live or present your screen.

Recording Tab
As a host, you can record sessions via the Recording tab in the Control Panel. Choose between Main Room (Grid), which captures the entire meeting in one file, or ISO, which creates individual files for each participant.
To start, select your recording type and click the Rec button. Every attendee will receive a consent modal before recording begins.
You can monitor the session under the Recording in Progress section.
To end, click the Rec button again. Once the file finishes transcoding, click the three-dots menu next to the recording to download it.

You're now ready to confidently host, manage, and participate in meetings on Coresee!
Need additional support?
Our support team is available to assist you with any questions or concerns you may have. Feel free to reach out by emailing us at help@coresee.com
Was this article helpful?
That’s Great!
Thank you for your feedback
Sorry! We couldn't be helpful
Thank you for your feedback
Feedback sent
We appreciate your effort and will try to fix the article