View Table of Contents
Overview
Configure Chat settings to manage participant engagement, moderate chats and more - all from the Admin Control Panel (ACP)! These features provide customization options to enhance collaboration and communication during meetings.
TODA TIP: Having trouble finding the Admin Control Panel? No problem! Below are the steps to get you to the ACP. 1. Starting in your TODA Live room, navigate to and click the Menu icon, located on the bottom right-hand side of your window. 2. Select the Admin Control Panel option.3. From here, a new tab or window will open for your rooms TODA Live Admin Control Panel. Learn More About> The Admin Control Panel
Chat Settings
The ACP offers various settings to customize your chat interactions. An Admin of TODA Live has the flexibility to enable or disable numerous options and adjust chat box positioning. Let's explore some of these settings to get a better understanding of how to optimize the chat experience.

TODA TIP: The on/off toggle is a switch that allows you to turn an action on or off. It has two states: "enable" and "disable".


You can switch the toggle between these two states by clicking on it.
By default - all toggles are set to the "disabled" state.


Force Open Chat
Force open chat automatically opens the chat panel as participants enter the room and the chat icon becomes disabled. This feature can be beneficial in situations where real-time collaboration and ongoing conversation are essential.

Enable Private Messages
Enable private messages allows participants to have private conversations without disrupting the flow of the main room chat. A tab labeled Individual will appear providing a clear overview of fellow participants with whom they are privately chatting.

Moderate Chat
Once moderate chat is enabled, Admins and Hosts gain the ability to control chat content by reviewing and approving messages before they appear in the main room chat.
The corresponding approval and hide icons can be found located to the right of each individual message in the ACP.

Click the check icon if you approve the message to be shared with the entire meeting.

To set expectations, all participants will be notified with the following message when this feature is enabled:

Click the x icon to hide a message from the main room chat, ensuring it is not visible to any participants.

NOTE: Messages that have been hidden through the 'ACP' are not permanently deleted, unless you choose to clear the chat. Otherwise, messages can be unhidden at any time.Enable File Sharing
Enable file sharing allows participants to share files with each other during your meeting via chat.
NOTE: The host will always have access to this feature, regardless of the status of the toggle.Enable Files Tab
By enabling the files tab, a dedicated tab for participants will appear within the chat for easy access to attachments shared within the room.

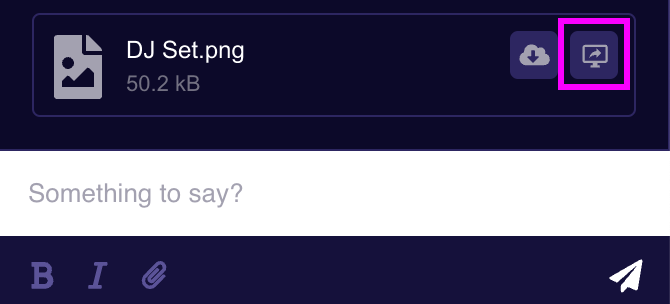
One-Click Presentation
Use one-click presentation to simplify the process of uploading and sharing media files through the main chat. Located to the right of each attachment, the Present icon makes sharing simple with just a single click.
Chat Positioning
Customize the placement of the chat panel on the screen. Here are a few options to consider:
Dock
Attaches the chat panel to the right-hand side of the room, making it stationary and easily accessible.
Undock
Detaches the chat panel from its fixed position, allowing it to move it around the screen.
Not Anchored
Allows participants to move the chat panel freely around the meeting room, providing flexibility in its placement on their screens.
Media View
Enhances the chat panel by anchoring the chat bar towards the bottom of the meeting room screen. This positioning optimizes the available space, providing ample room to display media content.

Clear Chat
To reset the conversation and clear the chat history from your meeting room, follow these steps:
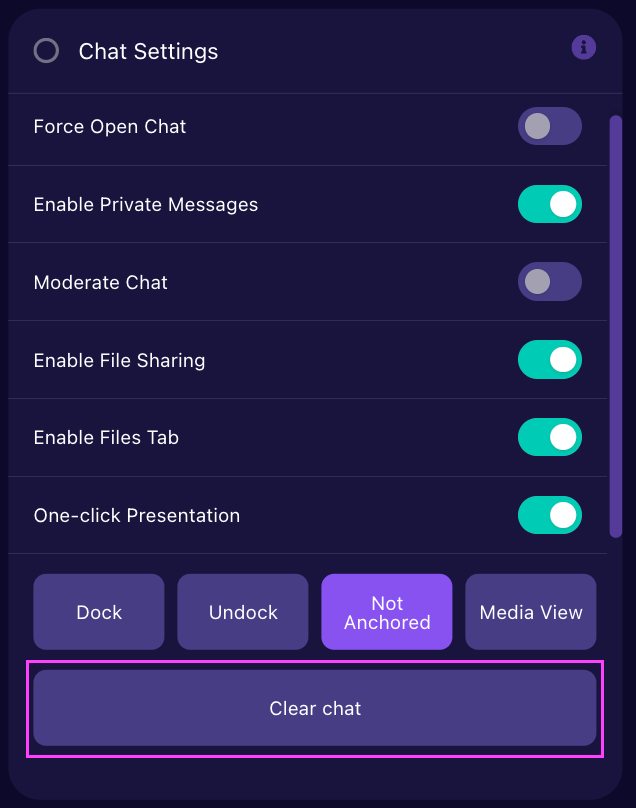
- Starting in the ACP Dashboard, navigate to the Chat Settings widget.
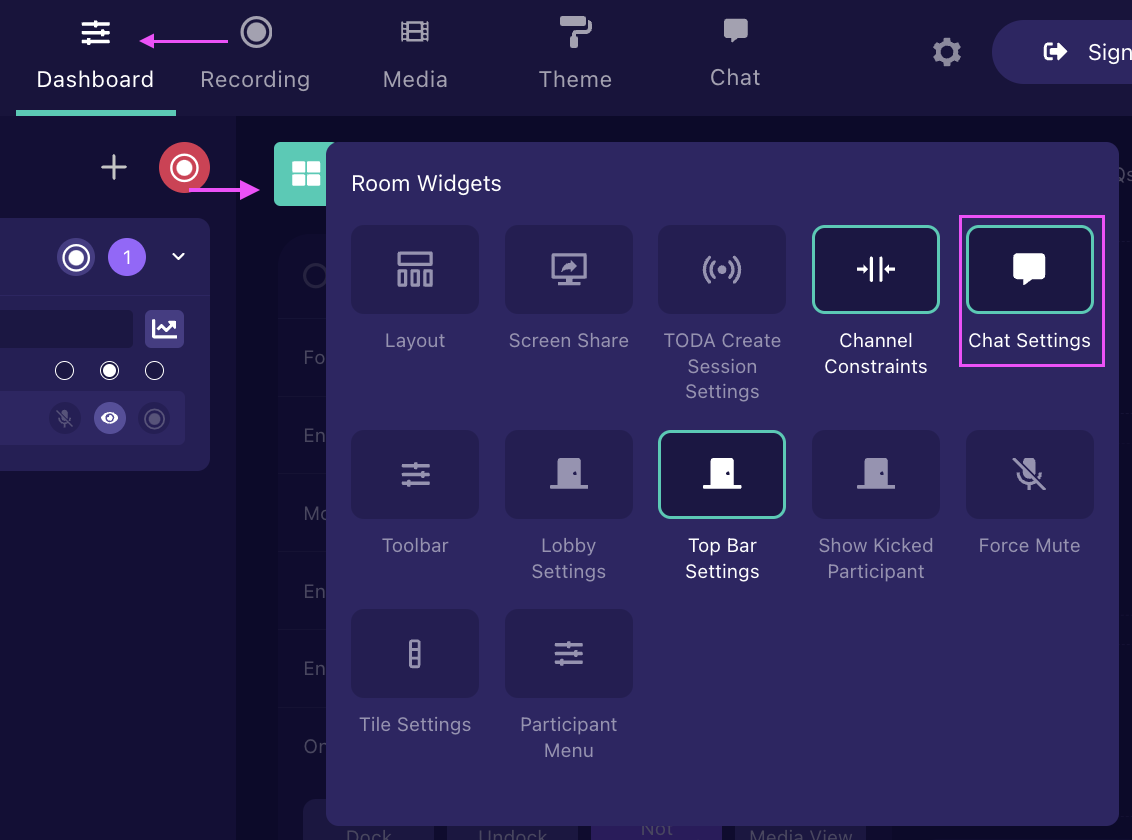
TODA TIP: If you are unable to locate the Chat Settings widget,
you may need to add it to your Dashboard.

Simply, click the Room Widgets icon and select Chat Settings.
- Next, at the bottom of the widget, click Clear chat.
- A confirmation prompt will appear.
- A confirmation prompt will appear.
- To move forward with deleting your entire chat history click Yes, or if you have changed your mind click Cancel.
NOTE: Before proceeding, please consider that chat messages
and shared files will be permanently deleted.

Need additional support?
Our support team is available to assist you with any questions or concerns you may have. Feel free to reach out by emailing us at help@lmmv.com.
Was this article helpful?
That’s Great!
Thank you for your feedback
Sorry! We couldn't be helpful
Thank you for your feedback
Feedback sent
We appreciate your effort and will try to fix the article